
essential knots for tarp shelter,tarp shelter setup,camping tarp setup
- 1- Why Knots Are Important for Tarp Shelters
- 2- Essential Knots for Tarp Shelter Setup
- 3- Step-by-Step Guide to Tying Key Knots
- 4- Real-Life Case: Setting Up a Tarp Shelter in the Wild
- 5- Tools and Gear to Enhance Your Tarp Shelter Setup
1- Why Knots Are Important for Tarp Shelters
When you're setting up a tarp shelter in the great outdoors, securing the tarp properly is essential. The right knots ensure that your shelter remains stable, even in adverse weather conditions. Whether you're camping in the mountains or enjoying a weekend getaway in the woods, knowing the proper knots can make the difference between a secure, weatherproof shelter and a collapsing tarp in a gust of wind.
Proper knot-tying is vital for securing the tarp to trees, stakes, or other anchor points. The knots need to hold tight without slipping or loosening, even when the tarp is exposed to rain or wind. In this article, we’ll explore the essential knots you’ll need to master for a reliable tarp shelter setup.
2- Essential Knots for Tarp Shelter Setup
When setting up a tarp shelter, there are a few key knots that will make your setup sturdy and reliable. Here are the most essential knots for securing your tarp in place:
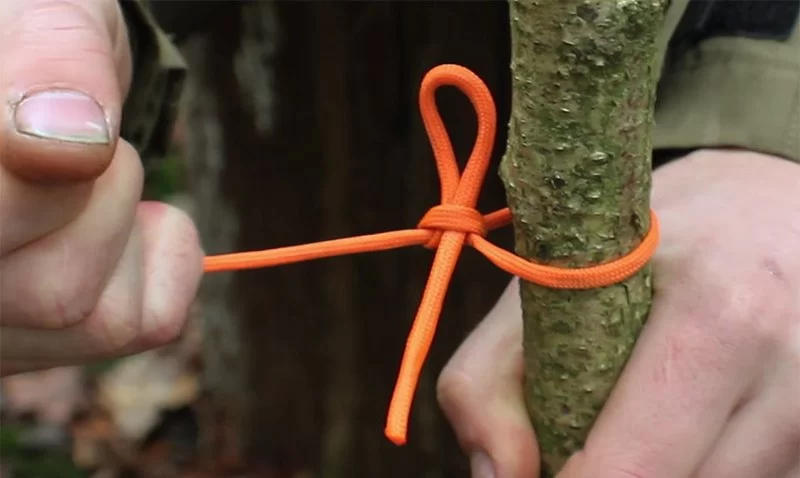
- Bowline Knot: The bowline is one of the most reliable knots for creating a fixed loop at the end of a rope. This knot is easy to tie and untie, even after it has been under tension. It’s perfect for creating a secure loop around a tree or pole when setting up a tarp shelter.
- Truckers Hitch: The truckers hitch is a fantastic knot for tensioning your tarp. It allows you to pull the rope tight, securing the tarp in place without worrying about it loosening over time. This knot is especially useful when you want to make sure your tarp stays taut and stable in windy conditions.
- Clove Hitch: The clove hitch is perfect for quickly tying a rope to a tree or pole. It’s easy to tie and adjust, making it ideal for setting up a tarp shelter where you may need to adjust the tension or position frequently.
- Half Hitch: The half hitch is often used in combination with other knots to provide added security. It’s simple to tie and works well for securing the loose end of the rope once you've set up the tarp.
- Sheet Bend: If you need to join two ropes together to increase length or to make the shelter more expansive, the sheet bend is your go-to knot. It’s strong, secure, and great for joining different types of ropes.
3- Step-by-Step Guide to Tying Key Knots
Now that you know the essential knots, let’s dive into how to tie them step-by-step to set up your tarp shelter effectively. Whether you’re a beginner or seasoned camper, these simple steps will help ensure that your shelter stays secure.
1. Bowline Knot
To tie the bowline knot:
- Create a small loop in the rope, leaving enough length to work with.
- Pass the working end of the rope up through the loop.
- Wrap the working end around the standing part of the rope.
- Bring the working end back down through the loop and pull tight.
2. Truckers Hitch
To tie the truckers hitch:
- Start by tying a bowline knot to create a loop at the end of the rope.
- Run the working end of the rope through the loop and back toward your anchor point (e.g., tree).
- Create a second loop and pass the rope through it to form a pulley system.
- Pull the rope tight to achieve the desired tension, then tie off the working end to secure it.
3. Clove Hitch
To tie the clove hitch:
- Wrap the rope around the pole or tree once.
- Cross the rope over itself to form an “X” and bring it around the pole again.
- Pull the ends tight to secure the knot.
4. Half Hitch
To tie the half hitch:
- Loop the rope around the anchor point (tree, stake, etc.).
- Pass the working end through the loop you just created and pull tight.
5. Sheet Bend
To tie the sheet bend:
- Make a loop with one of the ropes.
- Pass the working end of the other rope through the loop and around the standing part of the first rope.
- Pull both ends tight to secure the knot.
4- Real-Life Case: Setting Up a Tarp Shelter in the Wild
To illustrate the importance of these knots, let’s look at a real-life scenario. During a weekend camping trip, we were caught in a sudden rainstorm in the mountains. Without knowing the proper knots, many campers struggled with their tarp setups, causing their shelters to collapse under the weight of rain and wind.
However, by using the truckers hitch to create tension and the bowline to secure the tarp to nearby trees, our shelter held up perfectly. The ability to use these essential knots saved us from a soaked and uncomfortable night in the wilderness.
5- Tools and Gear to Enhance Your Tarp Shelter Setup
While mastering the right knots is essential, the right tools can make the process much easier. Here are some recommendations:
- Rope: Strong, durable rope is a must for any tarp shelter setup. Consider using paracord or synthetic ropes for their strength and weather resistance.
- Carabiners: Carabiners can help you quickly attach and adjust the tarp without needing to tie and untie knots constantly.
- Stakes: High-quality stakes are important for securing the corners of your tarp, especially in windy conditions.
- Tarps: Choose a tarp made from waterproof material that is large enough for your shelter needs, and ensure it has reinforced grommets for secure knotting.
For more tips on outdoor gear and tarp shelter setups, check out Pine Cliff Resort, where you can find all the tools you need to make your next camping trip a success.
Zion Crest Campground & RV Park
W Twin Knls Rd, Mt Carmel, UT 84755, USA
Visit Location PageCircle 'C' Campground, Inc
21 Bailey Pond Rd, Voluntown, CT 06384, USA
Visit Location Page