
Learn how to cook a campfire chili with simple ingredients, proper fire control, and expert tips for a warm, flavorful outdoor meal everyone will enjoy.
- 1-preparing-for-campfire-chili-cooking-#preparing-for-campfire-chili-cooking
- 2-essential-ingredients-and-equipment-#essential-ingredients-and-equipment
- 3-building-the-right-campfire-for-chili-#building-the-right-campfire-for-chili
- 4-step-by-step-campfire-chili-cooking-process-#step-by-step-campfire-chili-cooking-process
- 5-common-mistakes-and-how-to-avoid-them-#common-mistakes-and-how-to-avoid-them
- 6-adapting-campfire-chili-to-different-tastes-#adapting-campfire-chili-to-different-tastes
- 7-why-campfire-chili-belongs-in-every-outdoor-trip-#why-campfire-chili-belongs-in-every-outdoor-trip
Preparing for Campfire Chili Cooking
The first time I decided to cook chili over a campfire, I underestimated how different outdoor cooking feels compared to a kitchen stove. Campfire chili isn’t just about the recipe—it’s about timing, heat control, and planning ahead. When you’re outdoors, preparation becomes half the success.
Before even striking a match, I like to think through the entire process: how long the chili should simmer, how many people I’m feeding, and what the weather might do to my fire. Wind, cold temperatures, and even damp wood can affect cooking time, so flexibility is essential.
This mindset shift is what makes learning how to cook a campfire chili so rewarding. It’s slower, more intentional, and surprisingly relaxing once you get into the rhythm.
Essential Ingredients and Equipment
Campfire chili works best when ingredients are simple, hearty, and easy to manage outdoors. I’ve learned that less complexity often leads to better flavor when cooking over open flames.
1. Core Chili Ingredients
A reliable base includes ground meat or a plant-based alternative, beans, tomatoes, onions, garlic, and chili spices. Pre-measuring spices at home saves time and avoids fumbling with containers at camp.
2. Fresh Additions for Depth
Bell peppers, fresh herbs, or even a splash of coffee or dark chocolate can add depth. I usually prep these at home so they’re ready to go when the fire is hot.
3. Cooking Gear That Matters
A cast iron Dutch oven is my go-to for campfire chili. It distributes heat evenly and handles direct flames well. Long-handled utensils, heat-resistant gloves, and a sturdy lid make the process smoother and safer.
Building the Right Campfire for Chili
One of the biggest lessons I learned is that cooking chili doesn’t require roaring flames. Instead, it needs steady, controlled heat. This is where many beginners struggle.
1. Creating a Coal Base
I start with a solid fire and let it burn down into hot coals. Coals provide consistent heat without scorching the bottom of the pot.
2. Managing Heat Zones
By spreading coals and adding or removing them as needed, I create hot and cooler zones. This allows simmering without burning, which is essential for chili.
3. Adjusting for Weather Conditions
Wind can intensify flames unexpectedly, while cold weather can slow cooking. Staying attentive to the fire is part of the experience and keeps the chili on track.
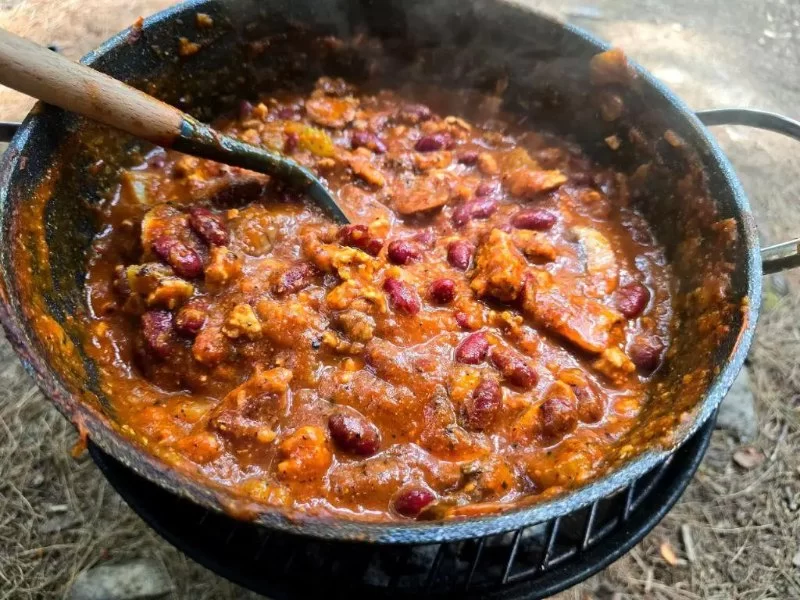
Step-by-Step Campfire Chili Cooking Process
Once the fire is ready, the actual cooking becomes a satisfying, hands-on experience that fills the campsite with incredible aromas.
1. Building Flavor from the Start
I begin by heating the Dutch oven and browning onions and garlic first. This creates a flavorful base before adding meat or alternatives.
2. Layering Ingredients Thoughtfully
After browning the main protein, I add spices early so they bloom in the heat. Tomatoes and beans follow, creating the classic chili texture.
3. Letting the Chili Simmer
This is where patience pays off. I move the pot to a lower heat zone and let it simmer slowly, stirring occasionally to prevent sticking.
4. Tasting and Adjusting Outdoors
Outdoor cooking affects seasoning. I always taste near the end and adjust salt, spice, or acidity based on how the flavors develop over the fire.
Common Mistakes and How to Avoid Them
Over time, I’ve seen the same mistakes happen again and again when people try campfire chili for the first time.
1. Using Too Much Direct Heat
Direct flames can burn chili quickly. Cooking over coals instead of flames prevents scorched flavors.
2. Rushing the Simmer
Chili needs time. Rushing it leads to flat flavor. Letting it cook slowly allows spices and ingredients to fully come together.
3. Forgetting to Stir
Unlike stovetop cooking, campfire heat is uneven. Regular stirring ensures even cooking and prevents burning.
Adapting Campfire Chili to Different Tastes
One of the reasons I love campfire chili is how adaptable it is. Whether I’m cooking for kids, spice lovers, or vegetarians, small adjustments make everyone happy.
1. Mild vs Spicy Variations
I often keep heat levels moderate and offer hot sauce or chili flakes on the side so everyone can customize their bowl.
2. Meat-Free Campfire Chili
Beans, lentils, and vegetables hold up beautifully over a campfire and create a satisfying, hearty chili without meat.
3. Toppings That Elevate the Experience
Simple toppings like shredded cheese, chopped onions, or cornbread make campfire chili feel like a full meal rather than just a dish.
Why Campfire Chili Belongs in Every Outdoor Trip
There’s something deeply comforting about sharing a pot of chili after a long day outdoors. I’ve watched conversations slow down, laughter grow louder, and everyone gravitate closer to the fire.
Cooking chili over a campfire isn’t just about food—it’s about connection, warmth, and creating memories. Many campers who stay at Pine Cliff Resort mention how meals like campfire chili become highlights of their trips, not just something to eat.
Once you understand how to cook a campfire chili, it becomes more than a recipe. It becomes part of the outdoor experience itself.
Muskrat Cove Group Camping Area
Park Rd, Prospect, PA 16052, USA
Visit Location PageCity of Chesapeake Northwest River CG
1733 Indian Creek Rd, Chesapeake, VA 23322, USA
Visit Location Page